
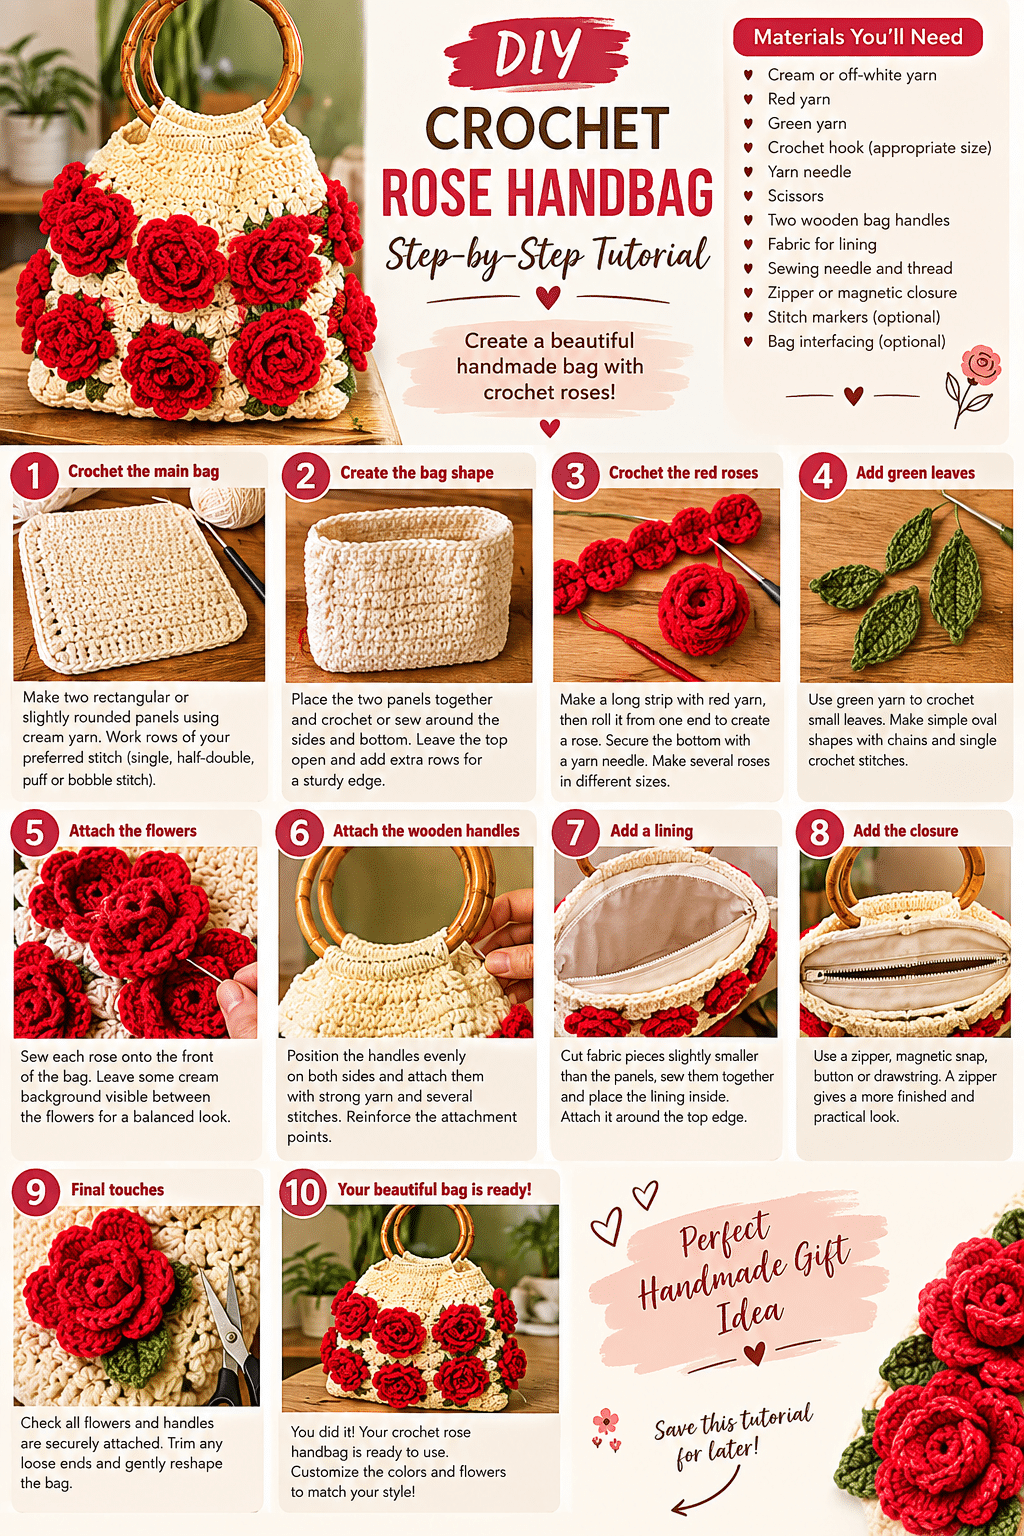
How to Crochet a Beautiful Rose Flower Handbag – Step-by-Step DIY Tutorial
If you love handmade accessories, this beautiful crochet rose handbag is a project worth adding to your crochet list. The combination of a soft cream-colored crochet body, bright red roses, and wooden handles creates a charming vintage and romantic look.
The best part is that you can customize the colors and flowers to match your personal style.
Materials You’ll Need
- Cream or off-white crochet yarn
- Red crochet yarn
- Small amount of green yarn
- Crochet hook appropriate for your yarn
- Yarn needle
- Scissors
- Two wooden bag handles
- Fabric for the lining
- Sewing needle and thread
- Zipper or magnetic closure
- Stitch markers
- Optional: bag interfacing for extra structure
Step 1: Crochet the Main Bag
Begin by making two large rectangular or slightly rounded panels using your cream yarn.
Work rows of your preferred crochet stitch until the panel reaches the desired handbag size.
For a more textured appearance, try:
- Single crochet
- Half-double crochet
- Puff stitches
- Bobble stitches
- Textured crochet stitches
Make sure both panels are approximately the same size.
Step 2: Create the Bag Shape
Place the two panels together with the finished sides facing inward.
Use cream yarn to crochet or sew around the sides and bottom.
Leave the top open.
For a stronger handbag, crochet several additional rows around the top opening.
This will create a sturdy edge where the handles can be attached.
Step 3: Crochet the Red Roses 🌹
The roses are the feature that makes this handbag special.
Using red yarn, crochet a long strip with small increases and textured stitches.
Once the strip is finished, carefully roll it from one end toward the other.
As you roll the strip, shape the crochet fabric so that it looks like a blooming rose.
Secure the bottom of each flower with a yarn needle.
Make several roses in different sizes.
Tip: Make larger roses for the center of the bag and smaller roses around the edges.
Step 4: Add Green Leaves
Using green yarn, crochet several small leaves.
You can make simple oval-shaped leaves using chains and single crochet stitches.
Place the leaves underneath the roses.
Arrange the flowers before attaching them so you can create a balanced design.
Step 5: Attach the Flowers
Use your yarn needle and matching yarn to securely sew each rose onto the front of the handbag.
Don’t attach them too close together.
Leave some of the cream crochet background visible between the flowers.
This will make the red roses stand out.
Step 6: Attach the Wooden Handles
Position the wooden handles evenly on both sides of the handbag.
Use strong yarn and several stitches to attach each handle.
Reinforce the attachment points because the handles will carry most of the weight when the bag is being used.
Step 7: Add a Lining
For a more professional-looking handbag, add a fabric lining.
Cut two pieces of fabric slightly smaller than the crochet panels.
Sew the fabric pieces together and place the lining inside the bag.
Attach it around the top edge.
A lining also prevents small objects from getting caught between crochet stitches.
Step 8: Add the Closure
You can finish the bag with:
- A zipper
- Magnetic snap
- Button
- Drawstring
- Decorative clasp
A zipper gives the handbag a more finished and practical appearance.
Step 9: Final Touches
Check all of the flowers and handles to make sure they are securely attached.
Trim any loose yarn ends.
Gently reshape the handbag if necessary.
Your beautiful crochet rose flower handbag is now ready to use!
Final Thoughts
This crochet rose handbag is a wonderful project for anyone who enjoys creating unique handmade accessories. You can change the red roses to pink, burgundy, purple, yellow, or any color you love.
It would also make a beautiful handmade birthday, Mother’s Day, or Valentine’s Day gift.
Save this tutorial on Pinterest so you can make it later! 🌹