
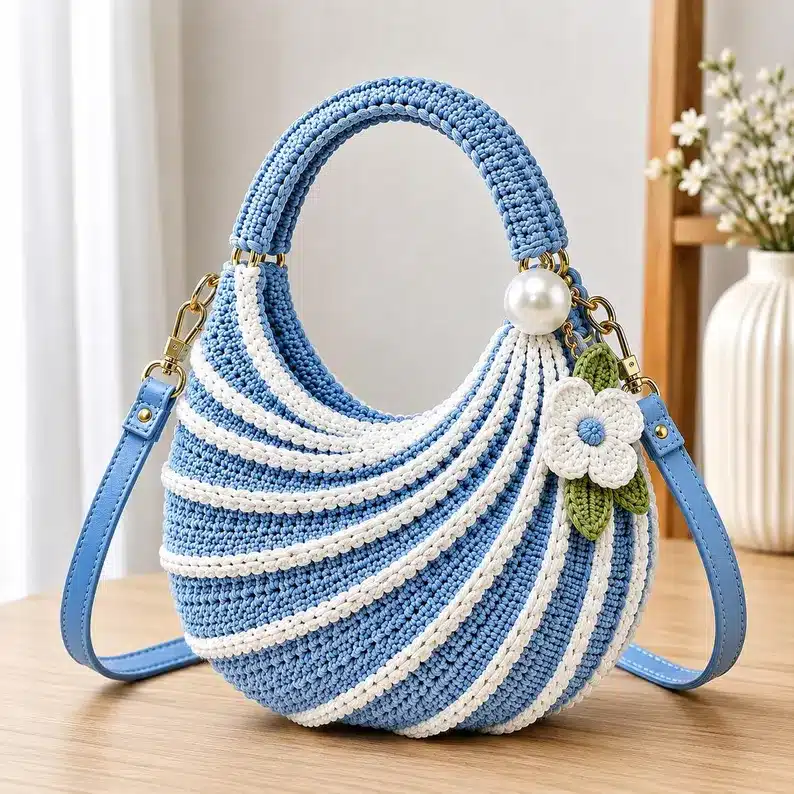
How to Make a Blue and White Crochet Round Bag
Looking for a crochet project that’s a little different from the traditional rectangular handbag?
This blue and white crochet round bag is a beautiful option.
The rounded body, contrasting white stripes, decorative flower, pearl detail, and shoulder strap create a feminine handmade accessory that works beautifully with casual and summer outfits.
Here’s a step-by-step construction guide.
Materials You’ll Need
- Blue medium-weight yarn
- White yarn
- Crochet hook suitable for your yarn
- Yarn needle
- Scissors
- Stitch markers
- Gold-tone bag rings
- Optional swivel clasps
- Optional shoulder strap
- Decorative button or pearl
- Optional crochet flower materials
Step 1: Crochet the Round Base
Start in the center of the bag.
Create a magic ring or another suitable circular starting method.
Work crochet stitches into the center and gradually increase around the circle.
Continue increasing until you reach the desired diameter.
The base should remain relatively flat.
Important Tip
If the circle starts becoming wavy, you may be adding too many increases.
If it begins forming a bowl shape too early, you may need more increases.
Step 2: Build the Rounded Body
Once the base reaches the desired size, reduce or stop the increases.
Continue crocheting around the outside of the circle.
The fabric will gradually form the rounded body of the bag.
Keep your tension consistent to achieve an even finish.
Step 3: Add the White Stripes
The inspiration design uses white decorative lines against a soft blue background.
You can create this effect by alternating colors during selected rounds.
Another option is to crochet raised white lines onto the finished blue body.
The second technique gives you more control over the stripe placement.
Step 4: Shape the Top
Continue working around the upper section until the opening reaches the desired size.
Keep the opening slightly smaller than the widest part of the bag to maintain the rounded silhouette.
Finish the top edge neatly.
Step 5: Crochet the Handle
Create a thick crochet handle using blue yarn.
Work several rows or rounds until the handle is sturdy.
The handle can be attached using metal rings for additional strength and a decorative finish.
Step 6: Add the Shoulder Strap
Attach two metal rings to the sides of the bag.
Connect a detachable strap using swivel clasps.
A matching blue strap works particularly well with this design.
Using a detachable strap also makes the bag more versatile.
Step 7: Crochet a Decorative Flower
Create a small crochet flower using white yarn.
Add a green crochet leaf if desired.
Attach the flower to one side of the bag.
This simple decoration gives the finished bag a cheerful handmade appearance.
Step 8: Add the Pearl Detail
Attach a decorative pearl or large bead near the flower.
Make sure it is secured firmly.
For a bag intended for frequent use, sew the embellishment multiple times rather than relying on a single attachment point.
Step 9: Finish the Bag
Weave in all loose ends.
Inspect:
- Handle attachments
- Shoulder strap
- Flower
- Pearl
- Top edge
- Side seams
Add a lining if you want extra structure.
Styling Ideas
This blue and white crochet bag pairs beautifully with:
- White dresses
- Denim
- Linen outfits
- Neutral tops
- Summer skirts
- Casual jeans
You can also replace the blue with:
- Lavender
- Pink
- Sage
- Beige
- Yellow
Final Thoughts
A round crochet bag is a great way to experiment with shapes and color combinations.
The blue-and-white palette gives this design a fresh appearance, while the flower and pearl details add a feminine finishing touch.